Originally the SDWAN and IOS Images for the ISR’s were shipped separately (ie not unified like they are now). If your Cisco router has come with the standard ISR Image, the SDWAN Image will need to be installed on the box to get the SDWAN Commands..
The instructions are to this can be found below:
- Connect the WAN interface to a network where the software can be located via FTP/TFTP/SCP etc. and ping the <Source> server.
- Enter the Config-t mode
- Copy the Bin to the bootflash using the following command:
copyftp:// username:password@<source>/<path>/<imagefile.bin> bootflash:
Remove existing boot statements with:
(config)#no boot system
#wr mem
- Set the image we copied to the bootflash as the boot image using:
(config)# boot system flash bootflash:<imagefile>
#wr mem
- Ensure the image we want is the specified boot image:
sh bootvar
The output should be something like:
BOOT variable = bootflash:c1100-ucmk9.16.10.4.SPA.bin,1;
CONFIG_FILE variable does not exist
BOOTLDR variable does not exist
Configuration register is 0x2102
- You might need to set the config register (depending on the age of the router), use the following command:
config-register 0x2102
- Reload the router, if requested DO NOT run the initial dialog. ONCE REBOOTED, you MUST CHANGE THE ADMIN PASSWORD. Otherwise you will need to recover it after the next boot. Once the router has the SDWAN Image, move onto the next step.
- Login to Software.Cisco.com
- From the main page, navigate to the Network Plug and Play -> Plug and Play Connect Page
You should see existing routers configured here, leave them alone 🙂
- Select ‘+Device’

- In the first step, select manual (unless you have the CSV)
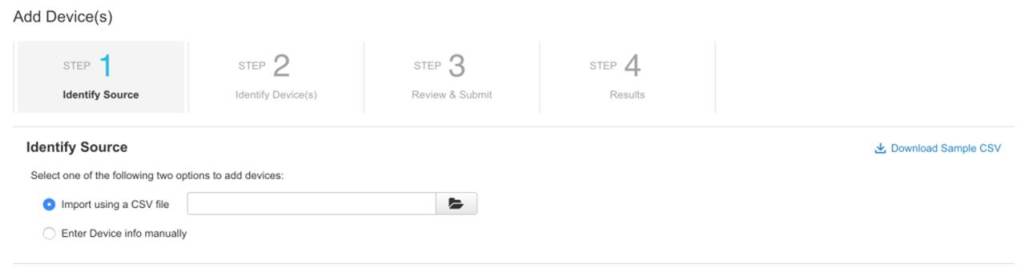
- Select next
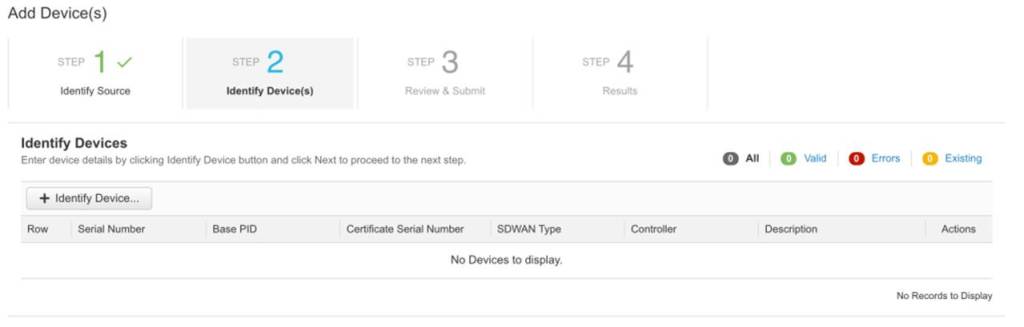
- On the next step, select ‘+Identiy Device’
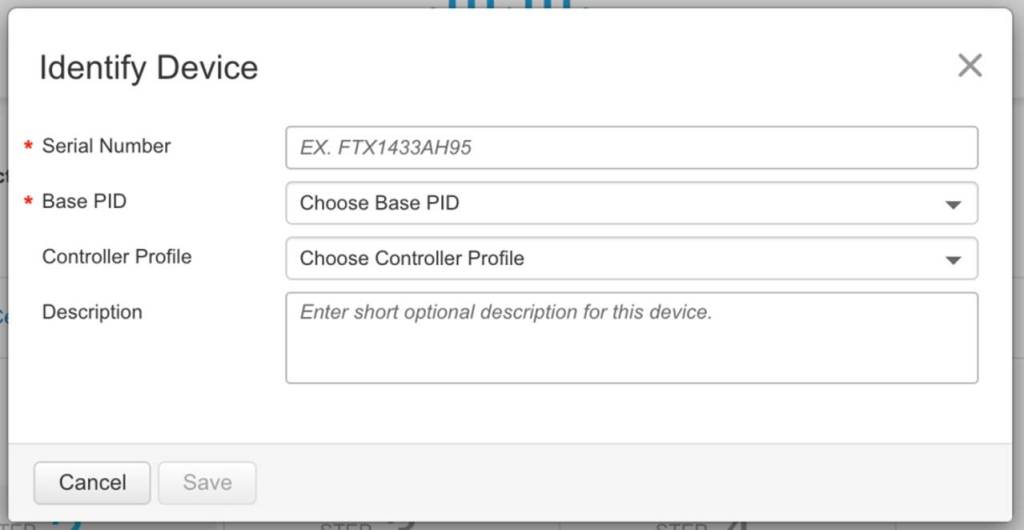
- The following dialog box opens, fill in the information as such:
- From the router enter the following command:
show sdwan certficate installed
and look for the information requested:
sh sdwan certificate installed
Board-id certificate
——————–
Certificate:
Data:
Version: 3 (0x2)
Serial Number: <Serial Number> (<Serial Hex Number>)
Signature Algorithm: sha256WithRSAEncryption
Issuer: CN=High Assurance SUDI CA, O=Cisco
Validity
Not Before: Sep 4 15:34:56 2018 GMT
Not After : Aug 9 20:58:26 2099 GMT
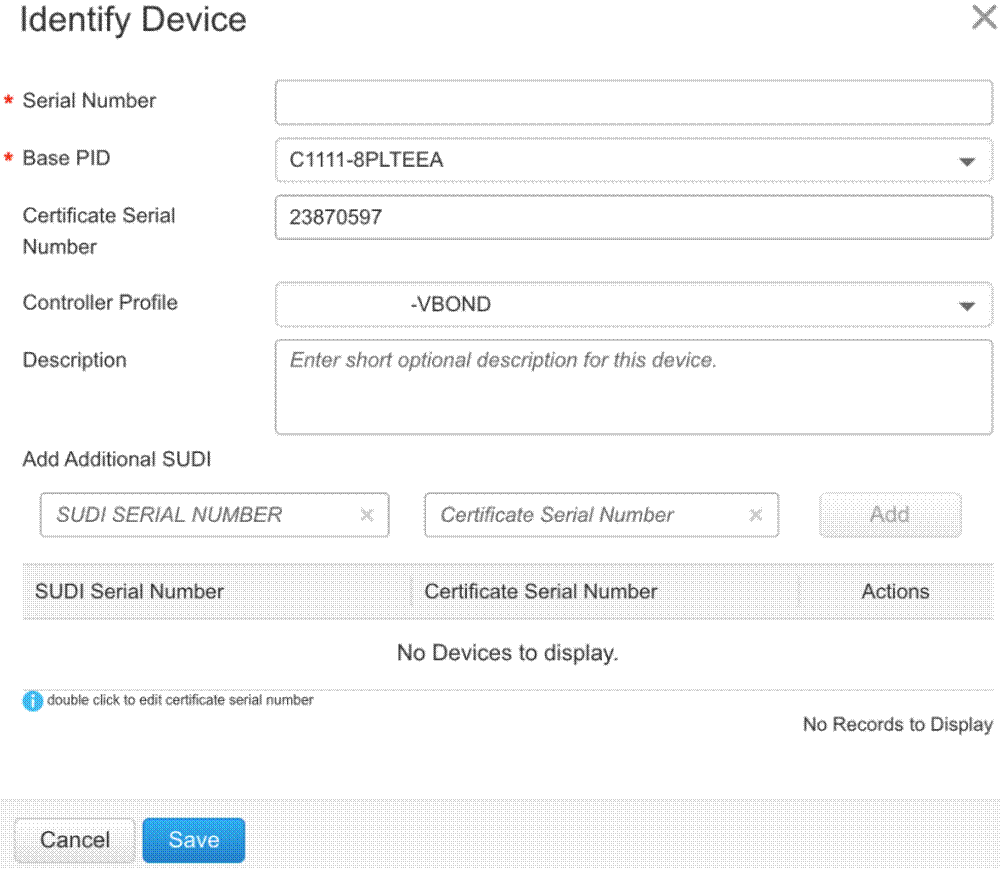
Subject: serialNumber=PID:C1111-8PLTEEA SN:<Serial Number>, O=Cisco, OU=ACT-2 Lite SUDI, CN=C1111-8PLTEEA
- Select the correct Controller Profile. For your lab, an idea is to create one which starts with <Your Org>.. This controller profile will point the SDWAN Edge to the vBond servers and automatically populate the setting. Otherwise you can manually set the vBond server DNS/IP Addresses on the CLI.
You might need to issue the pnpa service discovery stop command. The PNPA service will automatically run
- On the certificate shown, the subject contains the Base-PID, Serial Number of the Box
- Click Save. Move on to step 4 and review the details. Once you are happy, click next and you should see a ‘device successfully added’ result.
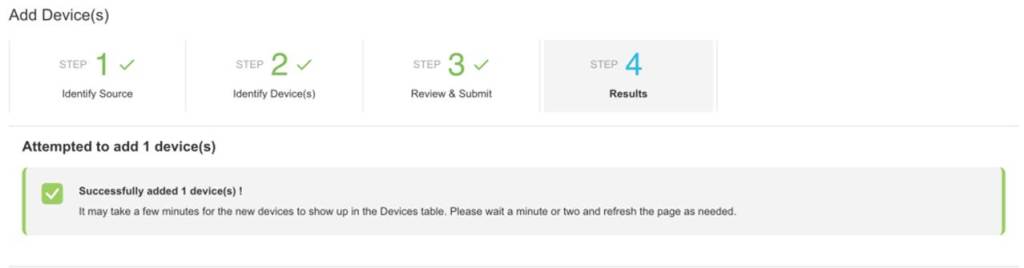
- In the devices tab now, you should see the device(s) added.

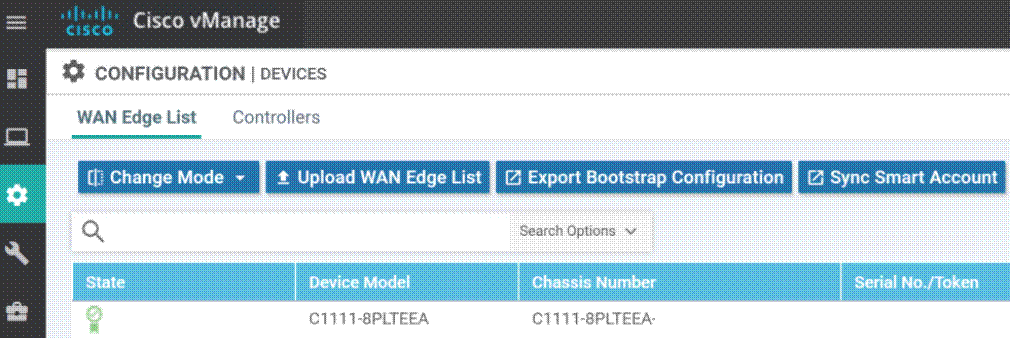
- From the vManage NMS Page, select Configuration -> Devices
Select ‘Sync Smart Account’ from the top of the page.
- Enter the login credentials for the Smart Account where the SD-WAN Devices are configured:
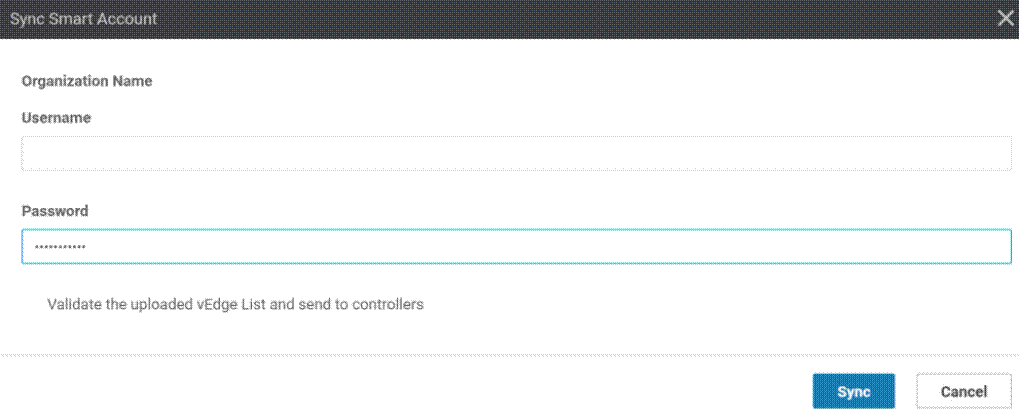
- Following the ‘Sync’ button press, the vManage NMS will connect to the Smart Account PNP site and download the device details. You should see a success screen after a while:

After a short while, you should see the device attached:

- On the CLI of the Router, issue the following command
request platform software sdwan software reset
Some other lines to configure to get the control plane up (remember, the SD-WAN image uses Config-Transaction, not Conf-T for configuration, and Commit must be completed before settings become effective):
pnpa service discovery stop
(config)#hostname <Hostname>
(config)#system
(config-system)#system-ip <SDWAN IP identifier>
(config-system)#site-id <site-identifier, numerical value)
(config)# interface Tunnel 0
NOTE: the capital T in Tunnel, and that the tunnel ID is the same as the interface unit ID.. So GE0/0/0 is Tunnel 0
Router(config-if)# ip unnumbered GigabitEthernet0/0/0
- It is imperative that you type the interface accurately, the command will take an incorrect interface.
Router(config-if)# tunnel source GigabitEthernet0/0/0
Router(config-if)# tunnel mode sdwan
(config)# GigabitEthernet0/0/0
(config-if)#ip address <insert IP Address or DHCP etc>
(config-if)#no shut
(config-if)#exit
(config)# sdwan
(config-sdwan)#interface GigabitEternet0/0/0
(config-interface-GigabitEthernet0/0/0)#tunnel-interface
(config-tunnel-interface)# color <describe the WAN connection type, see below>
The above describes the WAN Connection type.. The following are the options:
3g biz-internet blue bronze custom1 custom2 custom3 default
gold green lte metro-ethernet mpls private1 private2 private3
private4 private5 private6 public-internet red silver
(config-tunnel-interface)#encapsulation ipsec
- Final bits of IP Configuration:
(config)#ip route 0.0.0.0 0.0.0.0 <Gateway> might not be required if DHCP is used
(config)#ip domain lookup
(config)#ip name-server <DNS Servers>
(config)#commit
None of the above settings are valid until the commit command is performed. The configuration will be checked and committed, or you will get some error messages.
Validation:
To check if the SDWAN Edge is connecting, you can look at the dashboard on vManage, or use the following command
sh sdwan control connections
You should get reports of the services connections. vBond will come up initially, then connect you to the vSmart servers (2x) and the vManage (1x). You should see the state being UP. If not, refer to the troubleshooting documentation.


Leave a comment